Step-by-step guide for research group
Overview
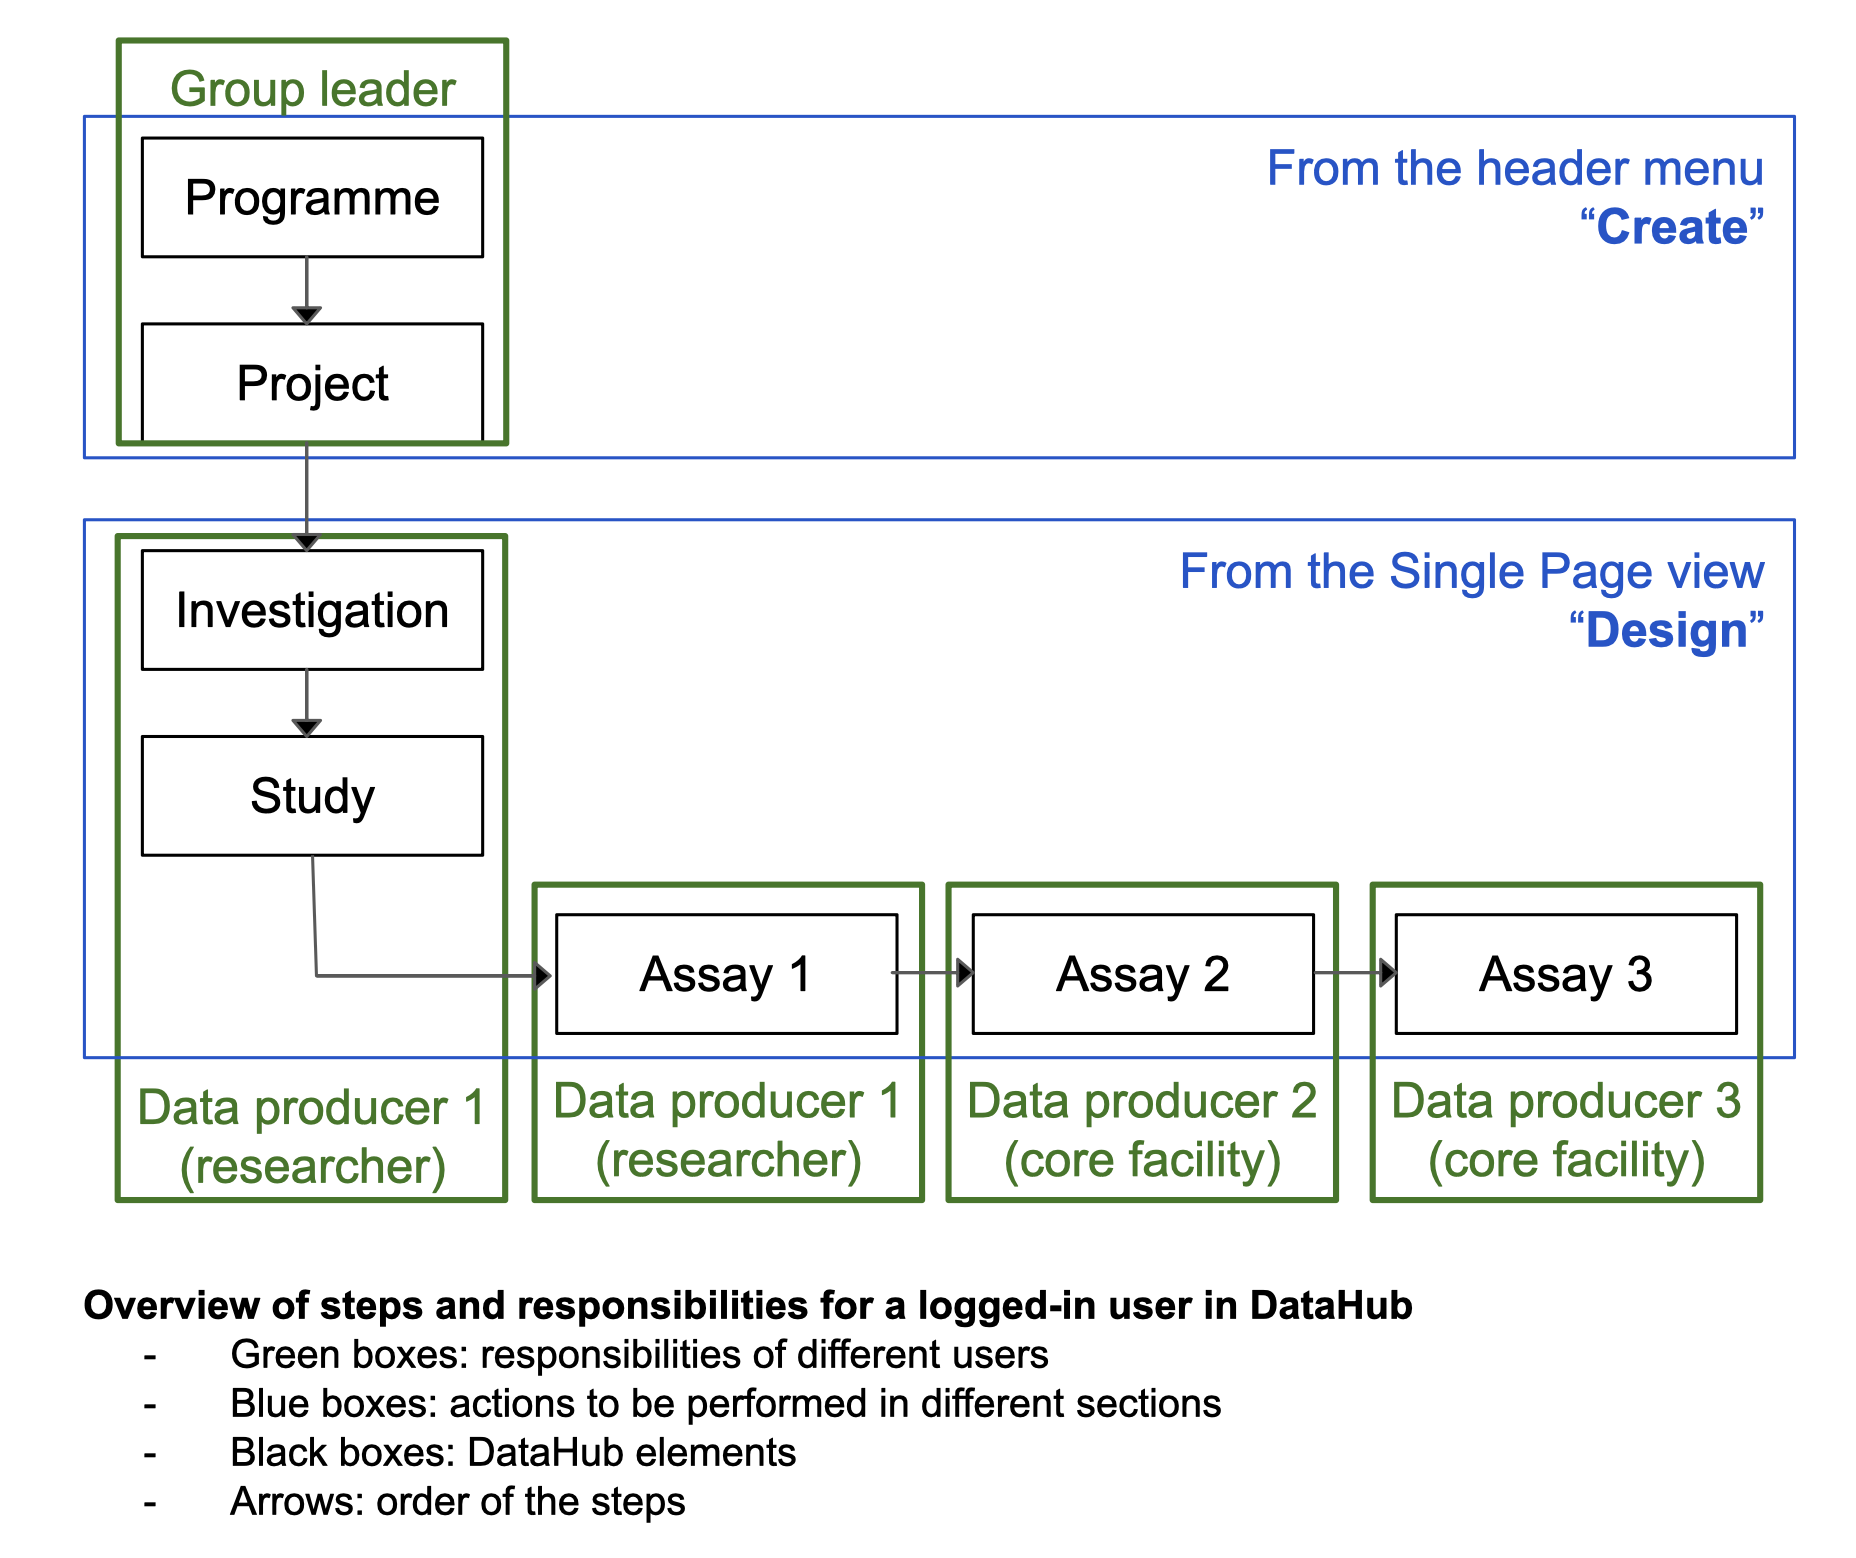
Group leader
1. Register
As first step, you have to create an account in DataHub. Follow the link to see how to register.
2. Login
To start organising your research, you must me logged in. Follow the link to see how to login.
3. Create a Programme
Create a Programme to group all your research projects under it. The title of the Programme could be the name of your laboratory or of your research unit. Follow the link to see how to create a Programme.
By default, you will be the only Programme administrator, but you can add more users later to so that more people can administer the Programme or help you do it.
Note that it is possible to create a new Programme with a new Project within, in one go. Follow the link to see how to create a Project.
4. Create a research Project
Now, you have to create a Project. A Project in DataHub should correspond to a research project of a PhD student or a PostDoc in your group or a larger research project (such as an ERC). Take into account that each Project can be further splitted in more than one Investigation.
See example of how to organise your research in DataHub.
Follow the link to see how to create a Project - this is instance specific. By default, you will be assigned as member and administrator of the created Project. This can be changed later.
5. Add members to the Project and manage their roles
Assign researchers or lab staff that will manage the research and/or perform the experiments to the Project. To this end, each researcher or staff must have a profile in DataHub.
Project members can have different roles, so make sure to assign the appropriate role to the right researcher or staff in your group.
Follow the link to see the different roles. Follow the link to see how to administer project members.
Researcher
1. Register
As first step, you have to create your account in DataHub. Follow the link to see how to register.
2. Login
To start organising your research, you must me logged in. Follow the link to see how to login.
3. Become member or administrator of a Project
After loggin in, you have to join a Project.
Follow the link to see how to join a project.
If your group leader adds you to a Project, you will receive an email. Follow the instructions as in the email. If your group leader adds your profile as Project Administrator, you have special capabilities to administer the project. Follow the link to see the roles and how to administer project members.
4. Create Protocols
Protocols of experimental steps or data analysis must be registered in DataHub in order to be associated with ISA Studies and ISA Assays.
Where to register your protocols
Protocols for a research group can be grouped
- within a dedicated Project only for protocols, within a Programme
- within a research Project
Follow the link to see how to register a protocol
A registered protocol can be associated to multiple ISA Studies and ISA Assays, according to the sharing permission rules set for the specific protocol.
Follow the link to see how to apply sharing-permission.
5. Design an ISA Investigation
An ISA Investigation could be a part of a bigger research project or an aspect of a research project (e.g. in vivo studies). It is a way to group related ISA Studies. Even if there is no need to further group the research, an Investigation must be created and could be titled as the Project.
See example of how to organise your research.
Follow the link to see how to design an ISA Investigation.
6. Design an ISA Study
An ISA Study is a central concept containing information on the subject under study (or observation unit), its characteristics and any treatments applied. A Study is a particular hypothesis, which you are planning to test, using various techniques.
See example of how to organise your research.
Follow the link to know more about what constitutes an ISA Study.
Follow the link to see how to design an ISA Study. Prerequisites:
- Make sure that Experiment Sample Templates for Study are available. See how to create Experiment Sample Templates.
- Ensure your protocol is registered, so that it can be associate to the Study.
7. Add Sources to ISA Study
Follow the link to see how to create Study Sources.
8. Add Samples to ISA Study
Follow the link to see how to create Study Samples.
9. Create an Assay Stream
An Assay Stream constitutes a structured sequence of sequential assays, interconnected through the flow of samples. Within an Assay Stream, the sample output of one assay serves as the input for the subsequent one. Each Assay Stream aligns with a single Assay in the ISA metadata framework. It is typically associated with one specific technology or technique, such as Metabolomics or Sequencing.
Follow the link to see how to create an Assay Stream.
10. Design an ISA Assay
Follow the link to know more about what constitutes an ISA Assay.
Follow the link to see how to create an ISA Assay. Prerequisites:
- Make sure that Experiment Sample Templates for Assay are available. See how to create Experiment Sample Templates.
- Ensure your protocol is registered, so that it can be associate to the Assay.
11. Add Samples to ISA Assay
Follow the link to see how to create Assay Samples.
Creator of templates
Experiment Sample Templates are essential for designing the descriptions of ISA Study Sources, Samples, and Assay Samples (see samples in ISA-JSON compliant experiments).
1. Create ISA Study and Assay Experiment Sample Templates
Follow the link to see how to create Experiment Sample Templates.
2. Share the templates
Use the sharing permissions to share the templates.