The ISA metadata framework requires the description (metadata) of different types of samples, namely Study Sources, Study Samples and Assay Samples. This description is based on customisable Experiment Sample Templates and includes the linking of applied Protocols. Follow the link for an overview about ISA-JSON compliant experiments.
In the context of an ISA-JSON compliant experiment, we use the terms ISA Investigation, ISA Study, and ISA Assay when referring to Investigation, Study, and Assay, respectively.
1. Creating an Assay Stream
- Select an ISA-JSON compliant Study, then click on “Design Assay Stream” button at the top right corner of the page.
- Fill out the form and click “Create”. After creation, sharing permissions can be managed.
- Assay position: Assay position determines the order in which Assay Streams are visualized in the tree view relative to each other.
2. Creating an ISA Assay
- Select an Assay Stream, then click on “Design Assay” button at the top right corner of the page.
- Fill out the provided form as explained below.
2.1 Link the Protocol
Select Protocols already registered in the platform that describe the used method or procedure (SOP) applied to the Assay. See how to create an SOP in SEEK. You can later change the SOP when editing the Assay.
2.2 Design a Samples table for Assay
The Assay Samples table can be used to register metadata about Assay’s outputs (other material or data file).
- The method, the protocol and its parameters (parameter value) applied to the Assay to generate the Assay’s outputs.
- Any relevant characteristics of the Assay’s outputs (other material characteristic or data file comment), from sample’s amount and quality to storage of each physical tube in a laboratory or of each digital data file in a file storage system.
The Assay Samples table is a Sample Type associated with the Assay and can only be accessed through the Assay interface. The Assay Samples table can only be created starting from an existing Experiment Sample Templates.
2.2.1 Choose one Experiment Sample Template
-
Choose one Experiment Sample Templates by clicking on “Existing Experiment Sample Templates” button.
-
Filter existing Experiment Sample Templates based on:
- the repository that will store metadata about your Study Sources (e.g. ENA, ArrayExpress or your institutional repository). Select “Project specific templates” if you want to use a template made for or by a specific Project
- ISA Level
- assay - material: if the output samples of the assay are physical materials
- assay - data file: if the output of the assays are digital data files
- organism
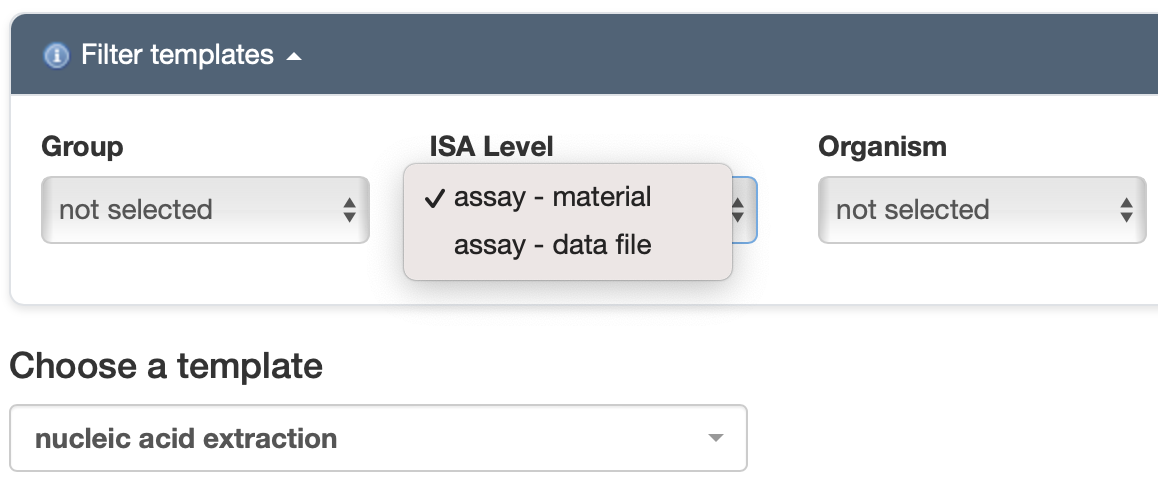
- Choose a template from the resulting dropdown menu.
- Select “Apply”.
- Give a Title to the Assay Samples table.
2.2.2 Customise the Assay Samples table
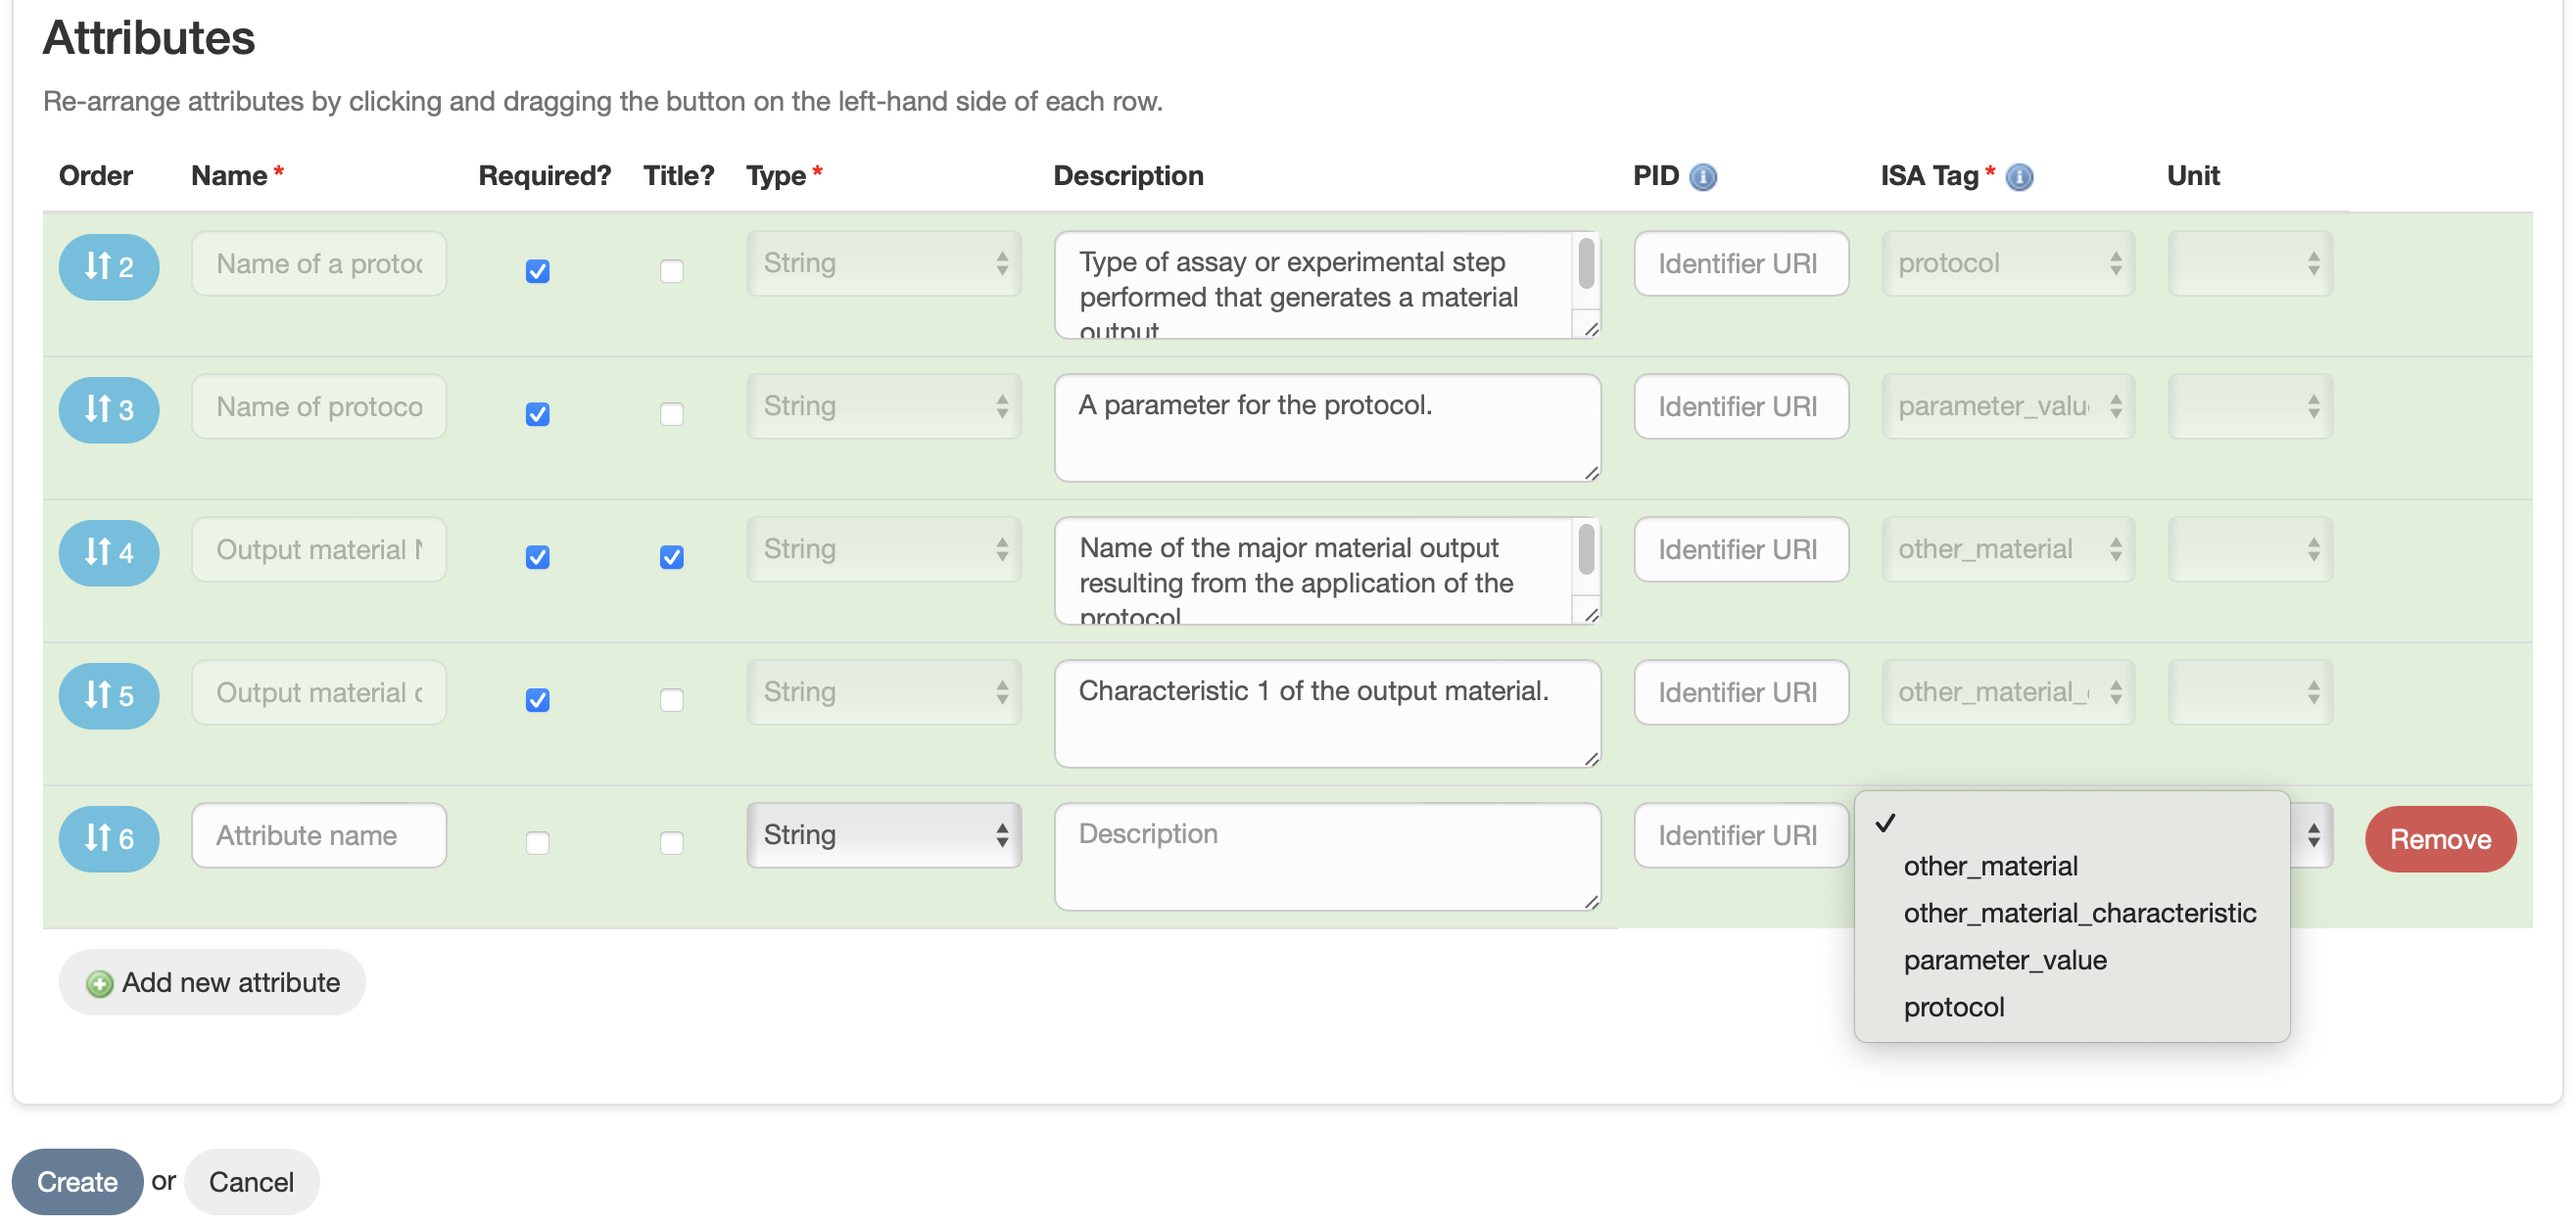
The Attributes table can be used to customise the Assay Samples table. However, be aware that applying changes may compromise the compliance to the original template.
- If you want to add new attributes of your choice to your Samples table, select “Add new attribute” button.
- Fill out the mandatory and optional fields. Note that for ISA-JSON compliant Experiments, the ISA Tag is a mandatory field.
- For ISA tag, select
- in case of ISA Level “assay - material”: “other_material_characteristic” or “parameter_value”;
- in case of ISA Level “assay - data file”: “data_file_comment” or “parameter_value”;
Note that selecting any other options would generate an error since other options are already selected in the starting template.
2.3 Visualise ISA Assay
Upon creation, the newly designed ISA Assay will appear in the tree view on the left sidebar, in Experiment View. Follow the link to know more about Experiment View.
3. Adding samples to ISA Assay
Follow the link to know how to create samples in ISA-JSON compliant experiments, including Assay Samples.
4. Managing assays in an Assay Stream
When editing or deleting an assay from an assay stream, different conditions apply depending on whether the assay has associated samples.
4.1 Deleting an Assay
An assay can only be deleted if it has no samples associated with it. If the assay contains samples, you must first delete those samples before proceeding with the assay deletion. If the assay is the last one in the assay stream, it can be removed without affecting the structure of the stream. If it is a midway assay (i.e., not the last assay in the assay stream), the system will automatically update the sample linkage. The input sample of the following assay will always link to the output sample of the preceding assay without requiring manual intervention. To remove, select the assay and click “Actions -> Delete ISA Assay” in the top right corner.
4.2 Adding an Assay
Adding a new assay is straightforward when it follows the last assay in the stream. This is permitted even if samples are associated with the assay. Select the last assay in the assay stream, and click the “Design the next Assay” button at the top right. For adding a midway assay, the next assay in the stream cannot have samples associated with it. Sample linkage is updated automatically, and no manual re-establishment is needed. To add a midway assay, select the preceding assay where you want to add an additional assay, and select “Insert a new Assay”. The new assay will be added after the selected assay.
4.3 Editing an Assay
Editing an assay follows similar rules to deletion. If an assay has associated samples, certain modifications to the metadata attributes may be restricted. However, it possible to add metadata attributes, or edit the assay’s title, description, etc.