Enabling openBIS in SEEK
By default openBIS is disabled. To enable the functionality described below, first go to the Admin pages (available from the user menu in the top right). Then select Site Configuration and the Enable/disable features. There is a checkbox to enable openBIS towards the bottom of that page.
Connecting your project to an openBIS space
Only a Project Administrator may configure connected spaces
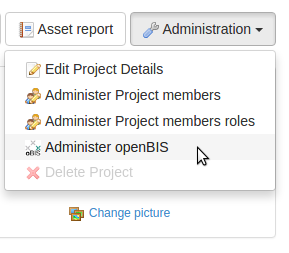
To connect a space from an openBIS instance, you need to select Administer openBIS from the project administer menu, as shown below
From here you will see a list of the currently registered openBIS instances and spaces, and also an button at the top giving the option to connect a new openBIS.
When connecting to openBIS, you will need to provide some fields.
- Main Web URL - this is the url to the front page of the openBIS you wish to connect to. When filling out this the field, the following 2 fields will be automatically populated with the default values.
- Application Server Endpoint - this is the endpoint URL SEEK needs to use to query the openBIS server. If you are not sure what this is then stick with the default derived from the main web url.
- DataStore Server Endpoint - this is the endpoint URL that SEEK needs to use to access the data on the openBIS server. If you are not sure what this is then stick with the default derived from the main web url.
- Username - the openBIS user account that SEEK will use to access the openBIS space. You may need to make a dedicated openBIS user that is given access to the space.
- Password - the password for the openBIS user account provided above.
- Automated Refresh Period - in hours, this this is how often SEEK will automatically synchronise metadata from the openBIS space.
- Study like types - codes of openBIS Experiment Types that will be recognized as SEEK studies.
- Assay like types - codes of openBIS Sample Types that will be recognized as SEEK assays (be default they are populate with types used with openBIS ELN).
Once the above information is provided, click Fetch spaces. This will check the above details and check the authentication. If the check is successful, the available spaces will be listed for selection.
Default sharing permissions can also be defined for the space. These are the permissions used when registering a openBIS entity with SEEK (as Study, Assay or DataFile). Once registered, it is possible to change these permissions just like for any other SEEK object using the Administration menu (e.g. Administration/Manage Assay if registered as Assay).
Browsing openBIS endpoint
Once openBIS has been connected to a project, it can be browsed by other members of that project. On the project page, a Browse openBIS button will become available.
Once selected, general information about it will be shown in SEEK, like for example number of registered openBIS experiments as SEEK Studies.
The shown endpoint can be changed by selecting the desired space at the top of the page.
There are four options available:
- Manage OBis Studies - allows registration of openBIS experiments as SEEK Studies.
- Manage OBis Assays - allows registration of openBIS samples/objects as SEEK Assays.
- Manage OBis DataSets - allows registration of openBIS datasets as SEEK DataFiles.
- Refresh metadata - triggers synchronization of registered openBIS elements and clear cached queries and objects.
Managing OBIS Studies
The available openBIS experiments are shown as cards.
Each card provides the standard openBIS identification details and a simplified view of the metadata (content) of the experiment. There is the Show/Register link that that leads to full view of the experiment and its subsequent registration/update. In case of an already registered experiment as SEEK Study there is also link to the study.
By default only the experiments that have a type recognized as Study are displayed (see the openBIS config options above). Individual study-like type can be selected from the list or ALL TYPES to see all the openBIS experiments.
There are check boxes on the cards for experiment selection for bulk registration and a button on top Batch registration that starts the process.
Registering an experiment as Study
Once experiment is selected by Show/Register link, its own screen appears. It presents the full experiment description (openBIS properties and attributes values). The screen also contains cards for all the openBIS samples(objects) and datasets that belongs to the experiment.
These samples(objects) and datasets can be registered together with experiment as Assays and DataFiles. There are few options that can control the registration process of the whole Study/Assay/DataFiles tree.
- Automatically register dependent datasets - all datasets that are under the experiment will be registered as DataFiles and linked to the new Study via OpenBIS FILES Assay.
- Automatically recognize dependent assays - samples(objects) which types are recognized as Assay like types (see config options above) will be registered as Assays and linked to the new study.
- Register with study checkboxes - datasets and samples can be independently selected for registration with the experiment using the check boxes present on their card. That option can be used to register samples(objects) which are not automatically recognized as Assays.
Of course, experiment can be registered alone if none of the above option is selected.
If system config allows it, there is one more option on the screen Periodically check for new entries. If selected, during periodic synchronization with openBIS SEEK will try to discover new datasets and samples which belongs to the experiment. The new entities will then also be registered as new DataFiles or Assays under the correct Study. Obviously it only works if Automatic registration and recognition is selected as well. It only registers samples that have types likes Assays. Use this option wisely, only if you are routinely create new entries under that experiment as checking for new elements and their registration is costly operation. It may be disabled on some installations.
Once register is chosen, new Study or whole Study/Assay/DataFile tree is created. Its visibility is set using the default sharing permission from openBIS endpoint configuration.
The Study screen contains now all the metadata from openBIS. It can now be normally edited to add SEEK description, manage its access or create new Assays under it. The Study can be search using the values from their openBIS metadata content.
The Study screen contains also button Registration options that brings the openBIS details screen and allows changing its registration details like for example linking new samples.
Batch registration of experiments
On the Manage Studies screen multiple experiments can be selected for bulk registration using the checkboxes on their cards.
Pressing Batch registration opens new dialog on which the parent Investigation must be selected.
There is also option Automatically recognize dependent entities if selected not only new Studies will be created by whole Study/Assay/DataFiles trees using the samples and datasets which are linked to each of the selected experiments. As in the case of individual registration only samples which have types recognized as assay-like will be registered together with experiments.
Managing OBIS Assays
The available openBIS samples(objects) are shown as cards.
By default only the samples that have a type recognized as Assay are displayed (see the openBIS config options above). Individual assay-like type can be selected from the list or ALL TYPES to see all the openBIS objects.
This screen behaves very similar to the openBIS Studies screen.
Registering a sample(object) as Assay
Once sample is selected by Show/Register link, its own screen appears. It presents the full sample description (openBIS properties and attributes values). The screen also contains cards for all the datasets that belongs to the sample.
These datasets can be registered together with sample as DataFiles. There two options that can control the registration process of the Assay with DataFiles.
- Automatically register dependent datasets - all datasets that are linked to the sample will be registered as DataFiles and linked to the new Assay.
- Register with assay checkboxes - datasets can be independently selected for registration with the sample using the check boxes present on their card.
Of course, sample can be registered alone if none of the above option is selected.
If system config allows it, there is one more option on the screen Periodically check for new entries, described under the above “Managing Studies” section.
Once register is chosen, new Assay or Assay and linked DataFiles are created. Its visibility is set using the default sharing permission from openBIS endpoint configuration.
The Assay screen contains now all the metadata from openBIS. It can now be normally edited to add SEEK description, technology type, manage its access or link new files or SOPs. The Assay can be search using the values from their openBIS metadata content.
Batch registration of samples
Similarly to experiments multiple samples can be registered as Assays. The batch registration involves first selecting the samples on the “Manage” screen adn then providing Study under wich new assays should be created.
Again, the dependent datasets can also be automatically registered with the Assays.
Managing OBIS DataSets
In normal circumstances datasets should be rather registered via their samples or experiments. But this section allows registration of individual datasets.
Managing DataSets is similar to Study or Assays so it won’t be separately described. The only difference is that obviously DataSets don’t have dependent elements that could be registered with them as Assay of DataFiles, so the registration options are simpler.
The DataFile screen contains now all the metadata from openBIS. It can now be normally edited to add SEEK description or manage its access or link to assays. This DataFile represents the whole openBIS DataSet including all its files. It can either be downloaded as a single zip file, or individual files can be downloaded via the files link.
The DataFile can be search using the values from their openBIS metadata content.
Unlike their description, the actual files are not copied from OpenBIS to SEEK, they are downloaded from the OpenBIS directly.
Understanding synchronization
Once registered in SEEK the openBIS entities becomes Study/Assay/DataFiles. They can be linked to other SEEK content and be part of new relation. They can be shared, make public all independent from openBIS. The metadata/descriptions of objects form openBIS is copied to SEEK upon registration so they can start their new life independent from openBIS.
But things can change and for example Experiment’s goals or results can be updated in OpenBIS. For that reason, SEEK periodically (as configured by Automated Refresh Period) will fetch content from openBIS and check for changes. As you already know SEEK can even detects new datafiles and links them to an assay!
Such checking takes time and it is possible that when hundreds of openBIS entities are registered the two hours refresh period may not be enough to process them all. In that case, the actual synchronization period for each object may be longer but rest assure that they all will get checked form time to time.
The Study/Assay/DataFile screen shows the details when the metadata were synchronized (Last sync. on top of the panel) as well as error messages if such synchronization failed. There is also Sync Content button which allows you to immediately synchronize content between OpenBIS and the given SEEK object.
The Mange OBIS Study/Assay/DataSets screens show cached versions of each openBIS entities. So it is possible that if new objects were created during last Automated Refresh Period hours they are not visible on the screens. Using the Refresh metadata form Browse openBIS endpoint screen clears the cache and the current state of OpenBIS is presented.
If content cannot be synchronized with OpenBIS for over 2 days, such entitiy is marked as failed and will no longer be automatically updated. It can still be manually synchronized afterwards.
In some cases, administrator may decide to disable automatic synchronization in the SEEK configuration. In that case SEEK will always present only a past snapshot unless manual synchronization is clicked.
Administration options
Apart from GUI feature to enable OpenBIS in SEEK, there are few options that can be set using SEEK config file.
They are:
- openbis_download_limit - that sets limit of file size than can be downloaded from OpenBIS via SEEK interface
- openbis_autosync - (true/false, default true) if set SEEK periodically check for content changes in OpenBIS and synchronizes them with local metadata.
- openbis_check_new_arrivals - (true/false, default true) if set SEEK will not only check for description changes but also it will check for the newly added datasets/samples under already registered studies/assay and register them automatically in SEEK under a correct parent.
- openbis_debug - (true/false, default false) used during development to print out some debug messages about openBIS related calls and operations.