Types of samples in ISA-JSON compliant Experiments
The ISA metadata framework requires the description (metadata) of different types of samples, namely Study Sources, Study Samples and Assay Samples. This description is based on customisable Experiment Sample Templates and includes the linking of applied Protocols. Follow the link for an overview about ISA-JSON compliant experiments.
In the context of an ISA-JSON compliant experiment, we use the terms ISA Investigation, ISA Study, and ISA Assay when referring to Investigation, Study, and Assay, respectively.
Study Source(s)
- Study Sources must be created within an ISA Study, using an Experiment Sample Template level “Study Source”.
- Each Study Source should be the input of at least one Study Sample (or more) in the same ISA Study.
Study Sample(s)
- Study Samples must be created within an ISA Study, using an Experiment Sample Template level “Study Sample”.
- Study Samples must be the outputs of a sampling protocol applied to ISA Study Sources, in the same Study.
- Each Study Sample must be the output of at least one Source (or more), in the same ISA Study.
Material output assay sample(s)
- Assay material samples must be created within an ISA Assay, using an Experiment Sample Template level “Assay - material”.
- Assay material samples must be the outputs of a protocol applied to the inputs of the Assay.
- Each Assay Sample must have at least one input (or more). Inputs can be:
- Study Samples in the same ISA Study;
- Assay samples from one preceding Assay, in the same Assay Stream.
Data file output assay sample(s)
- Same as for material output assay sample(s), but for assays specifically designed to produce data files.
Creating samples in ISA-JSON compliant Experiments
Create Study Sources
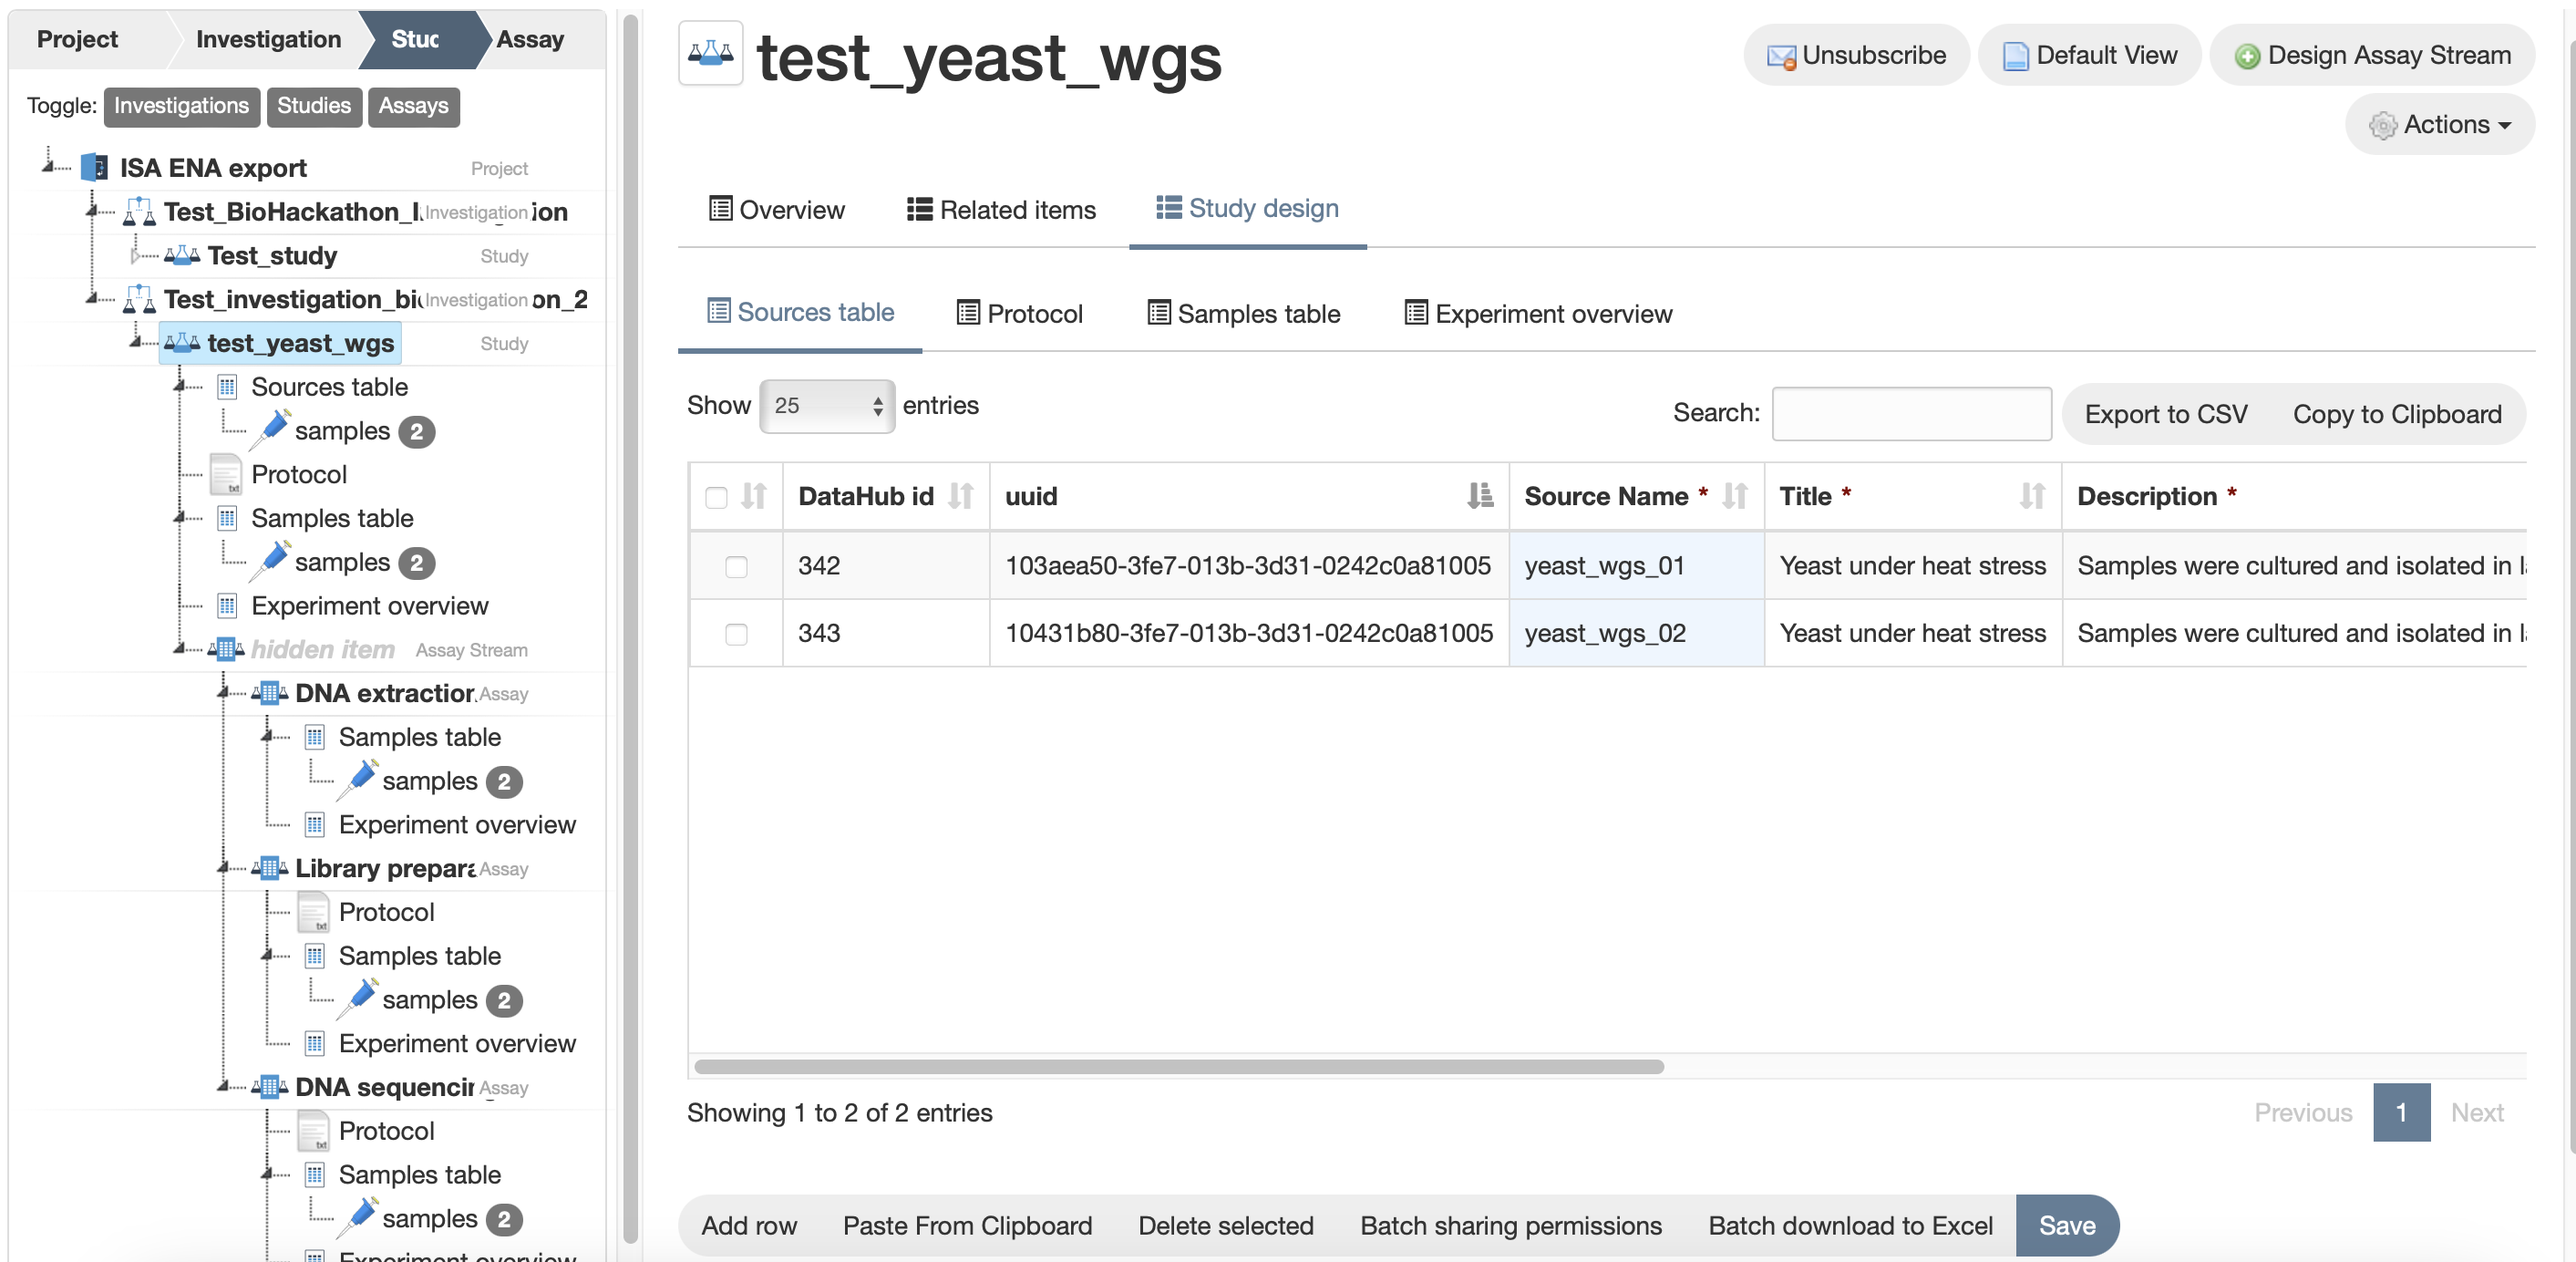
From Study design tab in experiment view, Sources can be created in two ways.
Via the Add row button.
- Select the Add row button at the bottom of the page. One row corresponds to one Source.
- Make sure to fill in all the mandatory columns and then select Save.
- Note that the light blue cells will define the name of each Source and should ideally be unique.
- Click on Save. For each row that gets saved, a single Study Source is created.
Via upload of the downloaded dynamic table
In the Source table window in experiment view:
- Click on “Batch download to Excel”.
- Open the downloaded Excel file, fill in the table offline and save it locally.
- Navigate to the same Sources table from the Study design tab, click on “Choose File” button at the bottom of the page, select the saved Excel file and click “Upload”.
- Verify and confirm the upload via the pop-up window, then click “Save”.
- If the file contains 100 rows or fewer, saving happens immediately.
- If the file contains more than 100 rows, saving runs as a background job. When processing finishes, you will receive an email notification, and the Sources will be available in the table.

Create Study Samples
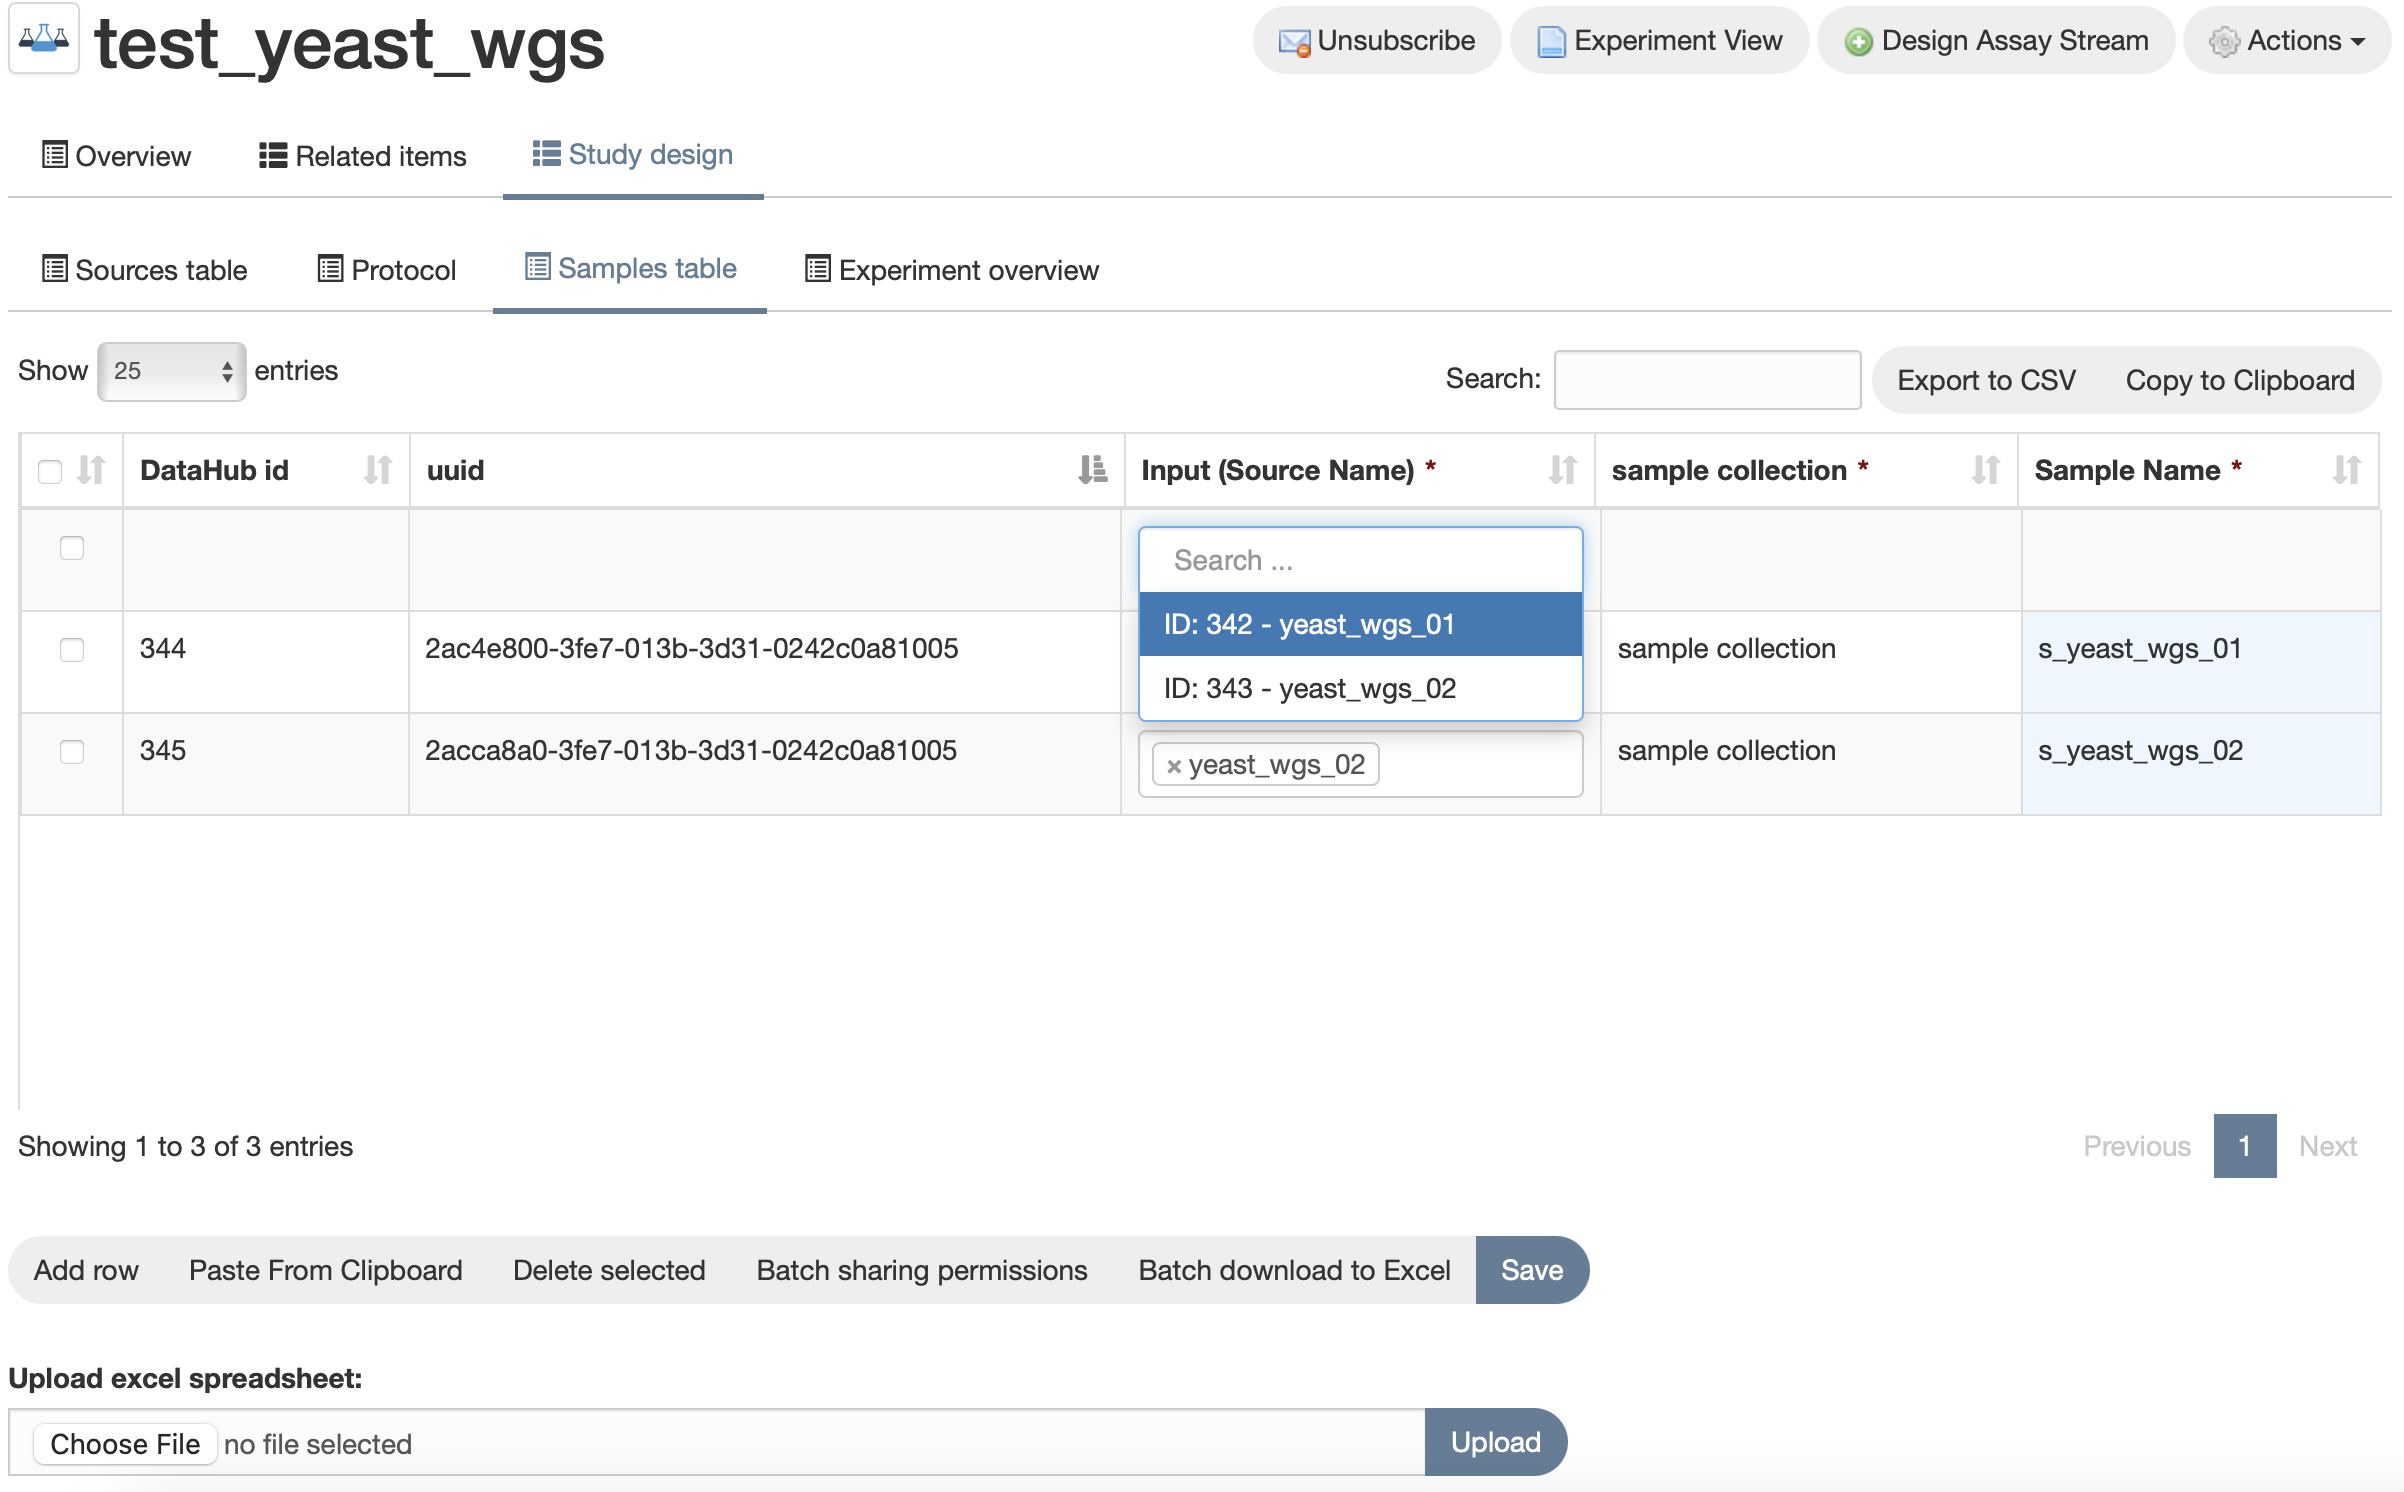
In the Study design tab in experiment view, Samples can be created in two ways, similar to Sources (see above). The only difference is the mandatory column “Input” in the Samples table, which must be filled with valid, existing Sources from the same Study. This requirement exists because the ISA model enforces sample lineage: every Study Sample must be derived from at least one Source to preserve traceability within the experimental design.
Via the Add row button.
Select the input Source(s) for the Sample you are creating in the “Input” column. Fill in the other metadata fields. Click on Save. For each row that gets saved, a single Study Sample is created. Note that it is possible to define a one-to-many relation (a single Source can be used in different Study Samples) or a many-to-one relation (multiple Sources can be the input for a single Study Sample).
Via upload of the downloaded dynamic table
In the Samples table window in experiment view:
- Click Batch download to Excel to export the table.
- Open the downloaded Excel file and fill in the rows offline. Values for the mandatory Input column in the Samples table can be added in batch.
- Navigate to the same Study Samples table from the Study design tab, click on “Choose File” button at the bottom of the page, select the saved Excel file and click “Upload”.
- Verify and confirm the upload via the pop-up window, then click “Save”.
- If the file contains 100 rows or fewer, saving happens immediately.
- If the file contains more than 100 rows, saving runs as a background job. When processing finishes, you will receive an email notification, and the Sources will be available in the table.
Linking Sources to a Study Sample requires a specific format. SEEK expects three pieces of information for each linked item:
- id: the numeric identifier assigned by the platform to each Source or Sample.
- This identifier is visible directly in the Samples table.
- It also appears in the sample’s URL.
- You can also retrieve it by exporting the table to CSV (‘Export to CSV’) or Excel (‘Batch download to Excel’) — useful when handling many samples.
- type: the type of asset to link. For this use case, the type is always “Sample”.
- title: the Source name as defined by the user.
To link different Samples, fill the Input column in the Excel file using the following syntax: One input value:
[{"id"=>343, "type"=>"Sample", "title"=>"yeast_wgs_02"}]
Two input values:
[{"id"=>343, "type"=>"Sample", "title"=>"yeast_wgs_02"}, {"id"=>342, "type"=>"Sample", "title"=>"yeast_wgs_01"}]

If the Experiment Sample Template includes an attribute such as Registered Sample or Registered Sample List, the linkage might work differently. If the Sample type that is being referenced is non-ISA-JSON compliant, you do not need the full syntax structure. Instead, simply provide the sample ID of the SEEK Sample in the Excel file. Always check the Experiment Sample Template to confirm which attribute type (and Sample Type) is expected before filling in the spreadsheet.
Create Assay Samples
In the Assay design tab in experiment view, Samples can be created in two ways, similar to Study Samples (see above). The only difference is the mandatory column “Input” in the Assay Samples table.
- The ‘Input’ of the first Assay must be linked to a valid and existing Study Samples from the same Study.
- For subsequent Assays, the ‘Input’ must be linked to valid, existing Assay Samples from the previous Assay (n-1) in the same Assay Stream. In both cases, sample linking via ‘Upload Excel spreadsheet’ requires the same syntax as described above.
Viewing samples in ISA-JSON compliant Experiments
Samples in ISA-JSON compliant Experiments can be visualised in the “design” tab (Study or Assay design). Samples are grouped in tables: Study Sources table, Study Samples table, Assay Samples table, Experiment overview.
Sources table and Samples table
Sources table and Samples table are interactive tables (dynamic tables) that allow samples creation and editing.
- Studies contain both Sources table and Samples table.
- Assays contains only Samples table.
Samples
In Experiment View, you can also view Study Sources, Study Samples, and Assay Samples in a searchable table by selecting “samples (n)” from the tree view on the left sidebar. Samples cannot be created or edited via this view.
Experiment overview
Experiment overview table shows an overview of all Sources and Samples in a searchable table. Samples cannot be created or edited via this view.
- In ISA Study, Experiment overview shows Study Sources and Study Samples.
- In ISA Assay, Experiment overview shows Study Samples and Assay samples, up until that experimental step.