SEEK allows you to publish investigations, studies and assays, replete with the structure and assets that comprise it. You can then assign a DOI to the investigation, which provides a persistent link with which you and others can use to cite them with.
The following describes the steps to publish an investigation, but also applies to Studies and Assays.
Making public
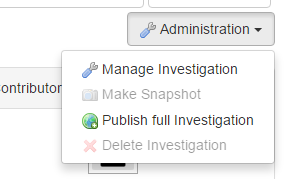
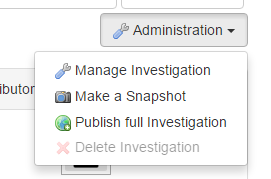
In order to make an investigation citable it must first be public. In order to make your investigation public, navigate to your investigation, and click the administration button in the top right hand corner of SEEK. Select the publish full investigation button.
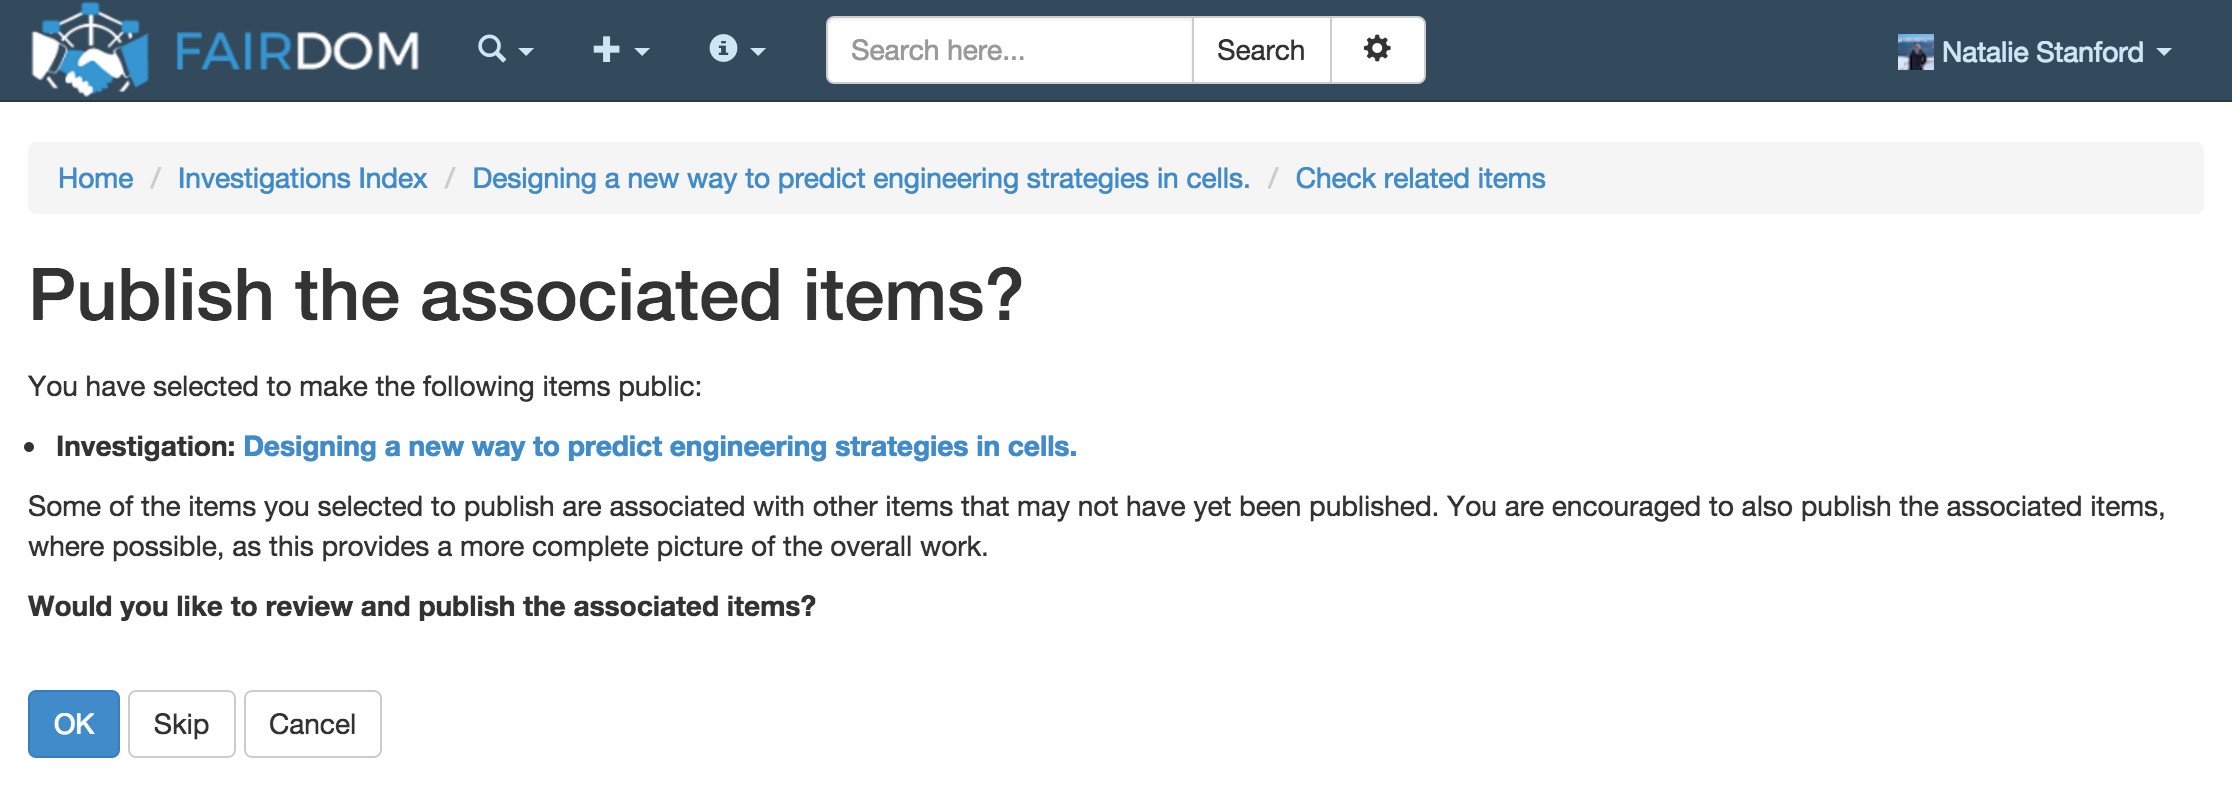
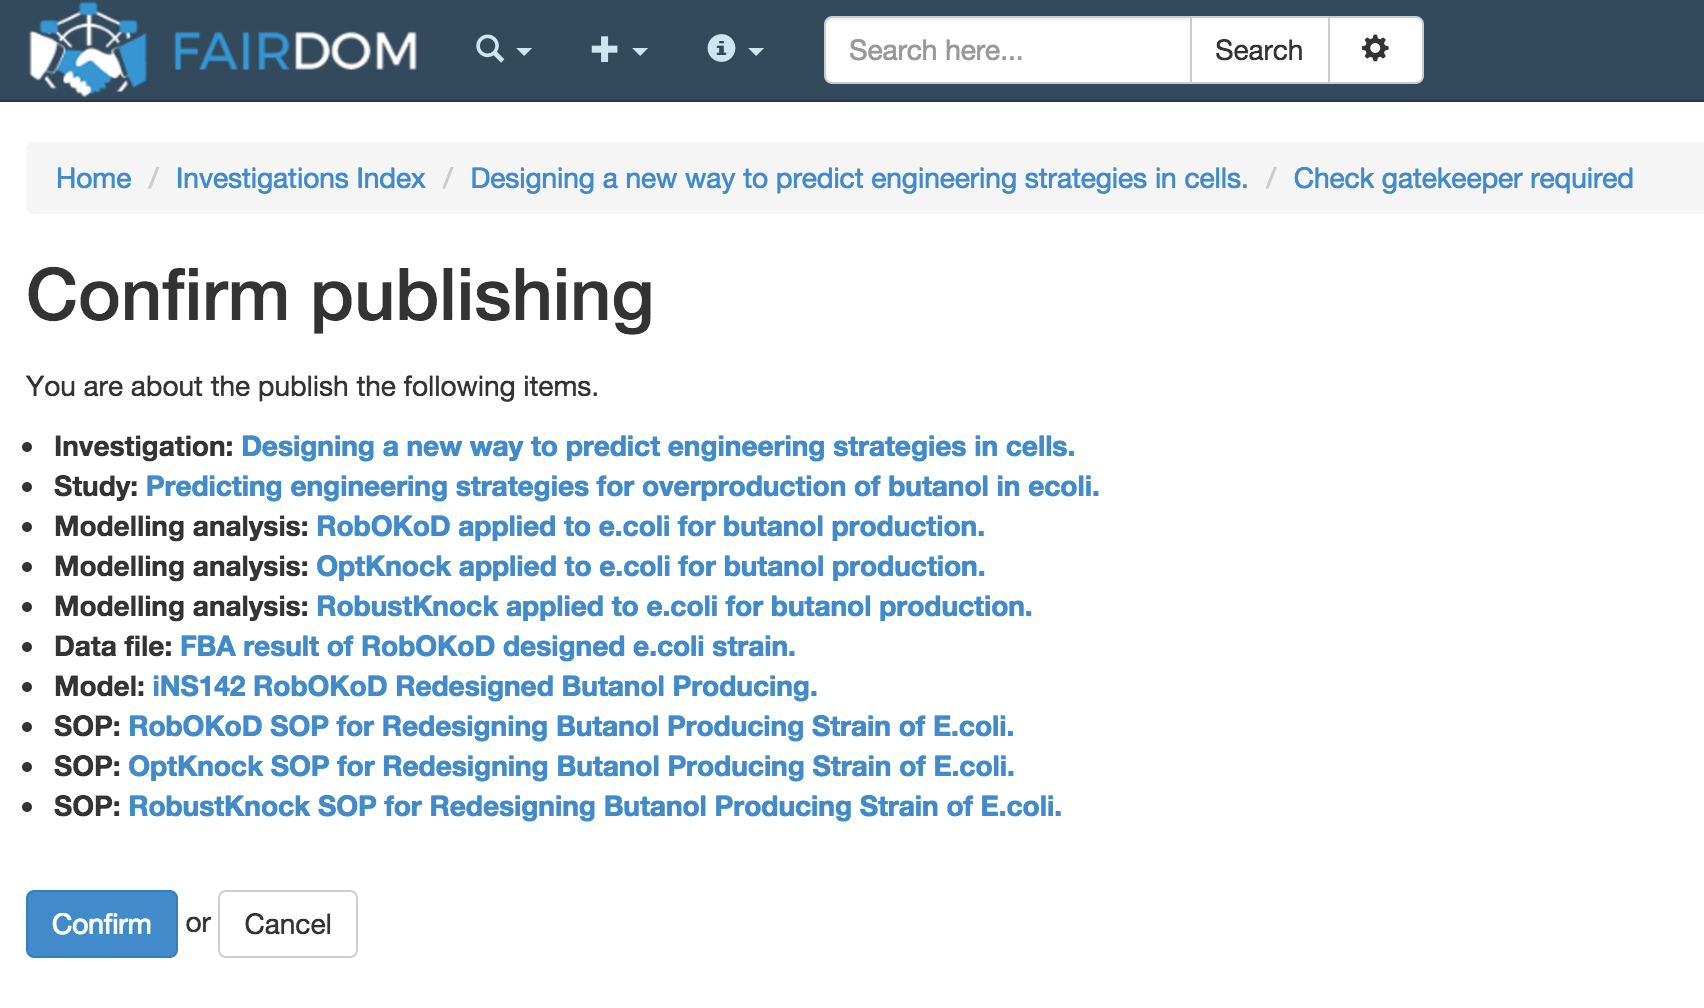
The investigation may have some studies, assays, and other asset files which are not yet public. You can review the items that are currently not public by selecting OK in the bottom left hand corner of SEEK. Or you can skip the step if you do not want to make anything else public.
You will be able to check any currently unpublished assets, and given an option to make them all, or a select few of them, public.
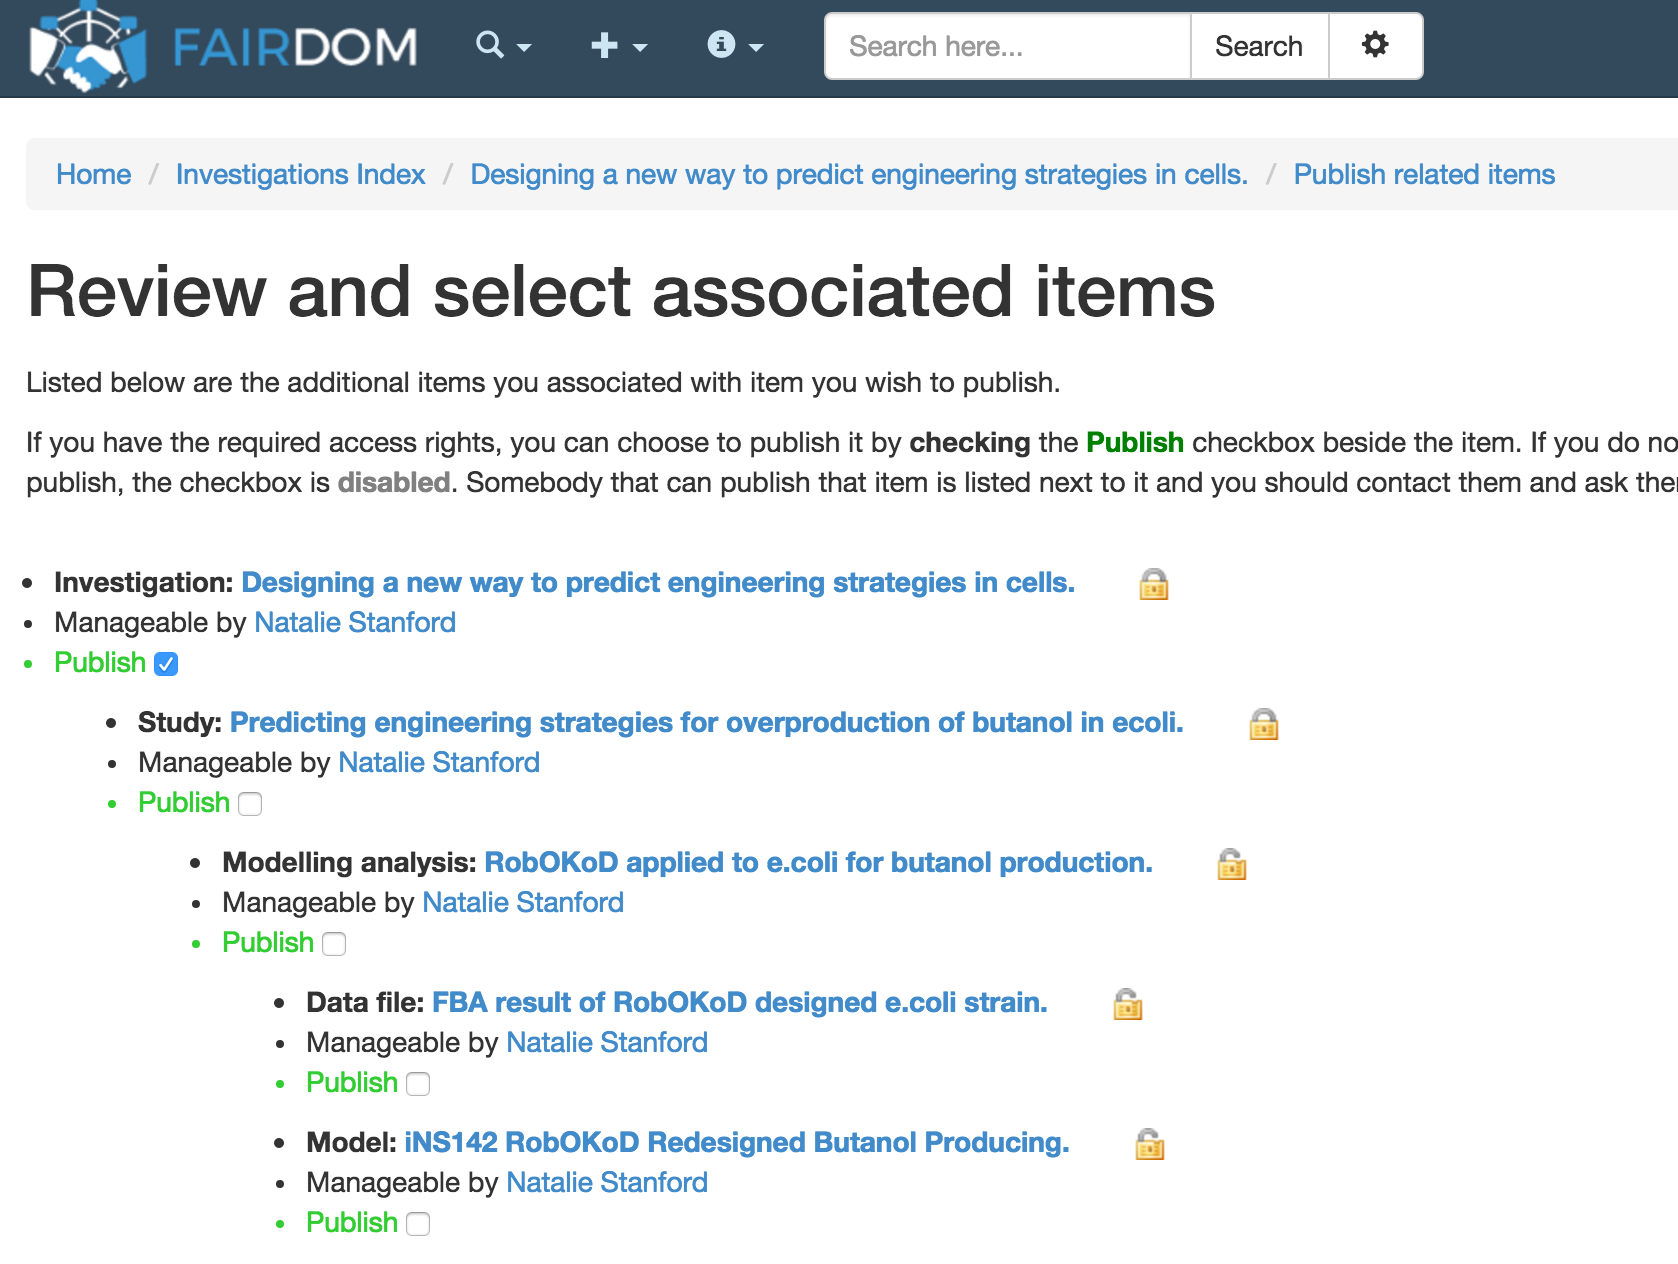
You will be informed of which assets you are planning to make public. To make them public you confirm the changes in the bottom left hand corner of SEEK.
Snapshotting
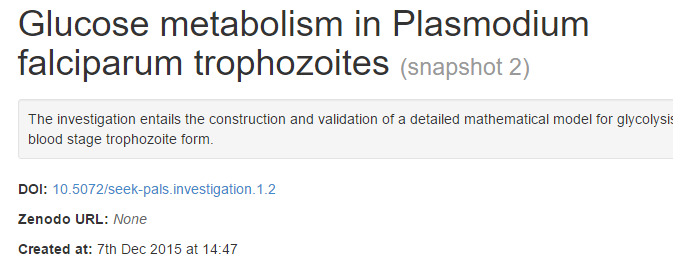
Once the investigation (at least) is public, a snapshot can be made of the investigation. Investigations are evolving and changing structures in SEEK. A snapshot is a way of freezing a version of the investigation in its current state, so that even if aspects of the investigation change over time, the frozen version can be accessed.
To generate a snapshot you need to select snapshot from the administration button in the top right hand corner of the investigation screen on SEEK.
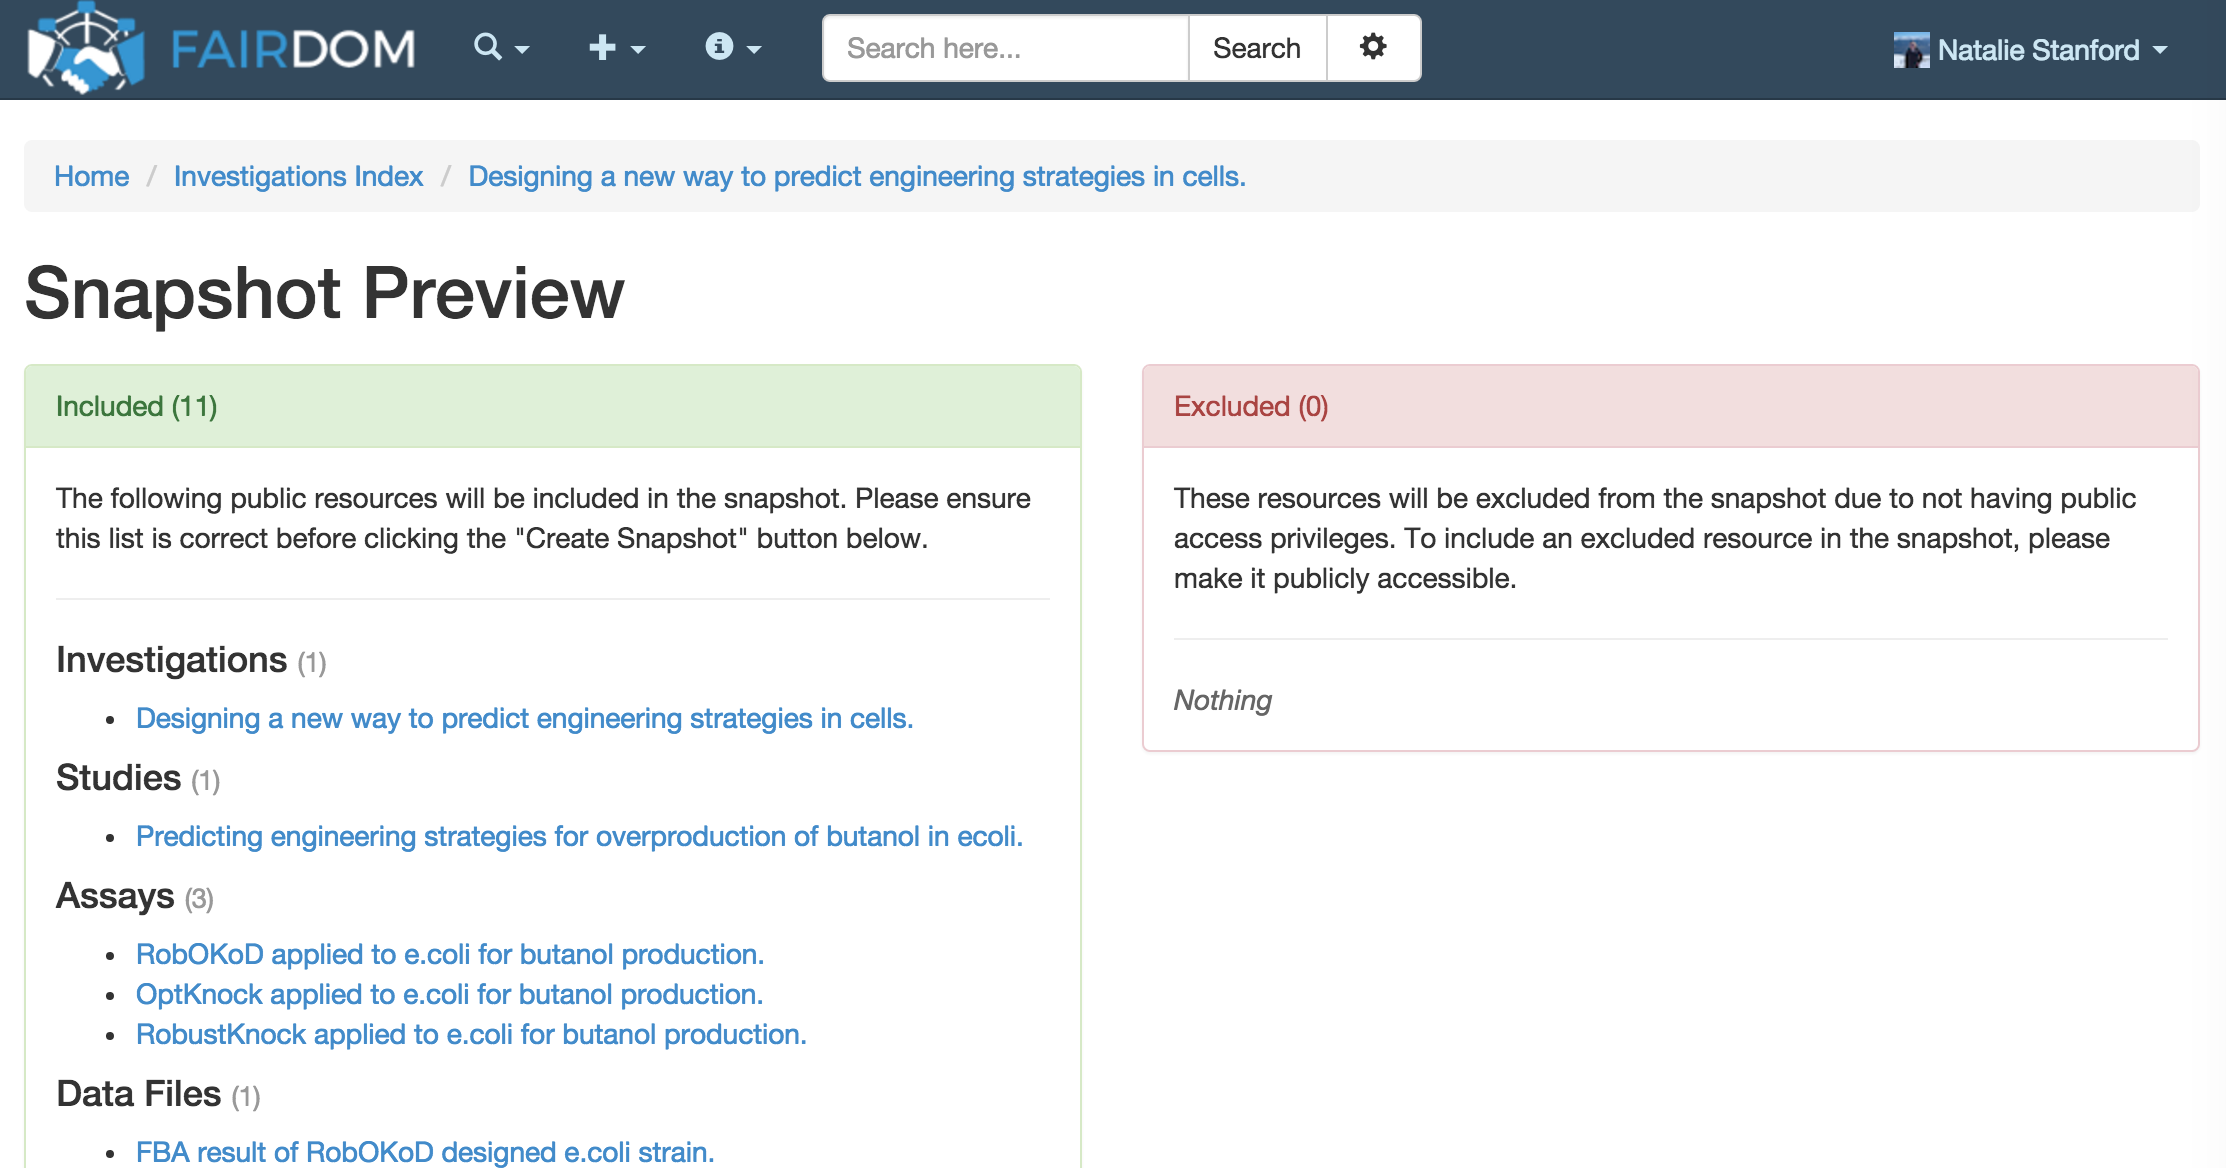
You will be given an inventory of items that will be included and excluded in the snapshot. All non-public items are excluded. You will have to make them public if you want them to be included in the snapshot. If you are happy with the contents of the snapshot you can proceed by clicking make snapshot in the bottom right hand corner.
Creating a Research Object
Now that the snapshot has been taken you can download the snapshot as a research object, by selecting the download button in the top right hand corner of SEEK.
Assigning a DOI
Now that the snapshot has been taken you can assign a DOI, which is a persistent identifier, to the snapshot. This allows you to persistently link to the contents of the snapshot, irrespective of whether it is moved to a different location. This allows the snapshot to be used in publications to complement or replace traditional supplementary material. It also allows for citation of your data by other researchers. You can assign a DOI by clicking the DOI button in the top right hand corner.
Once you generate a DOI, the snapshot will have a DOI logo associated with it, so you know which snapshot it is.
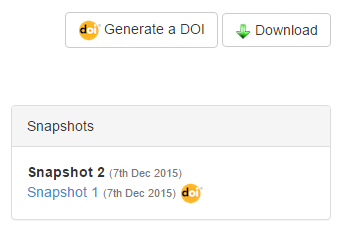
You will also be able to find the DOI link in the snapshots attributes